Back to blog
Article
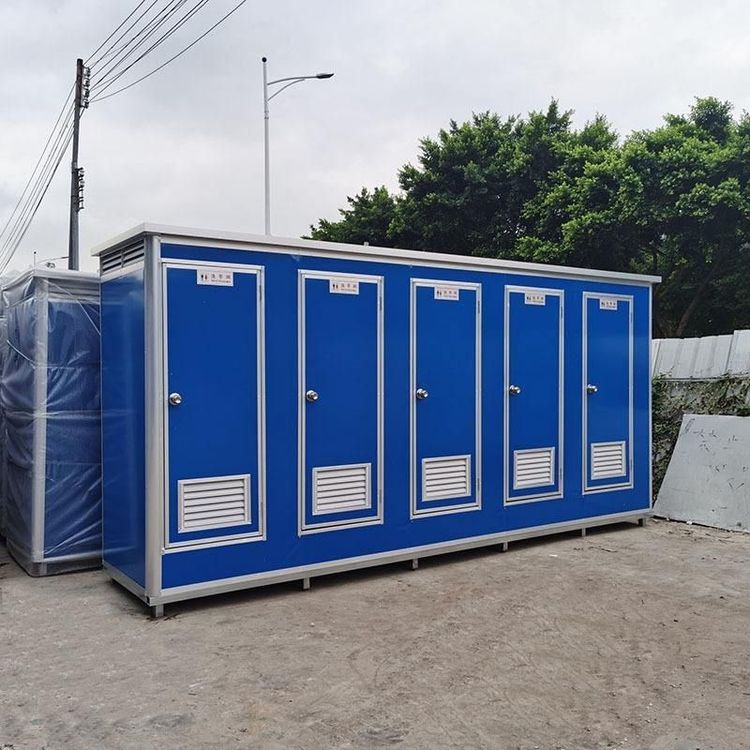
Xupu Mobile Toilet Installation Plan
Admin October 08, 2026
The installation plan for mobile toilets in Xupu should be implemented in stages according to specifications, taking into account site conditions. The key points are as follows:

I. Pre-installation Preparation
Site Survey
- Use a total station to measure ground flatness, ensuring a foundation bearing capacity of ≥1.5 tons per square meter to prevent toilet tilting or poor drainage due to ground settlement.
- Inspect underground pipelines (such as cables and water pipes), locate and mark them using a pipeline detector, and avoid critical areas during construction to prevent pipeline breakage and accidents.
- Confirm the drainage method: If connecting to the municipal sewage network, plan the pipeline slope (≥1%) and direction in advance; if using non-flush or biodegradable toilets, simplify the sewage connection but reserve inspection ports.
Team and Tools
- Form a dedicated team, including a project manager (for overall coordination), a technical supervisor (for technical guidance), installers (3-4 people for assembly), a safety officer (to supervise safety regulations), and a logistics officer (for material management), with clear job responsibilities.
- Prepare tools such as forklifts (for lifting the chassis), bolts (M8-M12 specifications), clamps, seals (silicone or rubber materials), and quick connectors (for water and electricity connections) to ensure rapid assembly of modular components.
II. Installation Process (Example for Split-type Toilets)
Chassis and Frame Positioning
- Use a forklift to place the prefabricated steel chassis smoothly in the predetermined position, adjusting the levelness error to ≤2mm/m using a level gauge.
- If the ground is soft (such as muddy ground), harden it in advance (by pouring C20 concrete) or lay a 10mm thick steel plate to enhance stability.
Wall and Roof Panel Installation
- Insert the sandwich panel walls into the chassis slots one by one, securing them with bolts or clamps at intervals of ≤300mm; when installing the roof panels, seal the joints with waterproof glue to prevent rainwater leakage.
- Wall installation usually takes 1-2 hours; check that the panel edges are intact to avoid reduced thermal insulation performance due to damage.
Internal Facility Connection
- Install toilets, flushing systems, sinks, lighting, and ventilation equipment, prioritizing the use of quick connectors when connecting water and electricity pipelines to shorten installation time.
- If connecting to the municipal sewage network, install a water trap (with a water seal height of ≥50mm) to prevent odor backflow; if using an independent septic tank, reserve a cleaning port (with a diameter of ≥400mm) and cover it with a protective lid.
Functional Testing
- Conduct flushing tests (three consecutive flushes without blockage), circuit checks (insulation resistance ≥0.5MΩ), and seal checks (spray water to test for joint leakage) to ensure all functions are normal.
- Adjust details such as the width of barrier-free access (≥900mm) and the range of night lighting (illuminance ≥30lx) to meet the needs of the usage scenario (such as adding deodorization devices in scenic areas).
III. Key Considerations
Drainage and Odor Control
- For short-distance displacement (≤400mm), use a displacement device, apply PVC special glue at the connection, and install a seal ring to prevent leakage; for interlayer drainage, consult with the downstairs occupants for renovation, ensuring proper waterproofing (by applying 1.5mm thick polyurethane waterproof coating) and installing a water trap during renovation.
Environmental Protection and Safety
- Control construction noise to ≤60 decibels (during the day), and classify and transport construction waste 100% (separating recyclables, hazardous waste, and other waste).
- The main structure should have a wind resistance rating of ≥Grade 8 (verified by wind tunnel testing), and it should not be put into use until it passes the waterproof test without leakage.
Efficiency Optimization
- Integrated box-type toilets can have their interiors finished in the factory, requiring only on-site lifting into position and connection of water, electricity, and sewage pipelines, shortening the overall installation time to 2-4 hours.
- Professional team construction can significantly improve efficiency, with skilled teams able to dismantle a standard split-type toilet in only 1-3 hours.
IV. Subsequent Maintenance
- Regularly check for aging of bolts and seals (every 3 months), tighten loose components; clean the septic tank according to usage frequency (if applicable, every 1-2 years) to prevent blockage.
- The installation should comply with the "Mobile Toilet Hygiene Specifications" (GB/T 21239-2023), and the specific plan can be further refined according to the local terrain in Xupu (such as reinforcing the foundation in mountainous areas), climate (such as strengthening waterproofing in rainy areas), and usage needs (such as adding temporary toilets during the tourist peak season).