Back to blog
Article
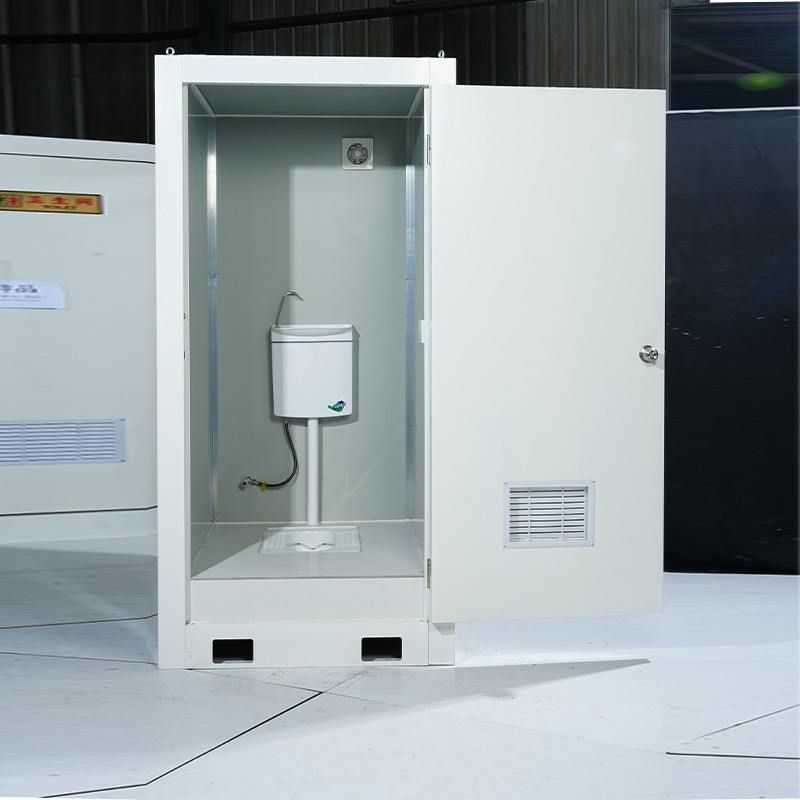
1.1-meter Mobile Toilet Installation
Admin September 28, 2026
The installation of a 1.1-meter mobile toilet must follow standardized procedures, with specific steps outlined below:
I. Preliminary Preparation
1. Site Selection: Prioritize flat terrain that is not prone to water accumulation and is far from fire sources. Ensure easy access for collection vehicles, avoiding low-lying areas, wind tunnels, and positions directly facing main pedestrian paths.
2. Foundation Treatment:
- For soil surfaces, compact the ground and lay a 10cm layer of gravel or plain concrete.
- For concrete floors, place the toilet directly; if uneven, use rubber pads or thin steel plates for leveling.
3. Tool Preparation: Equip with a crane or forklift, expansion screws, level gauges, wrenches, sealant, electrical wires, and other tools.
4. Material Inventory and Inspection: Verify the quantity, model, and accessories of the mobile toilet (such as sinks, flushing devices, sewage pipes, etc.). Check for no damage to the equipment's exterior and that internal facilities are intact.
II. Formal Installation Steps
1. Hoisting/Positioning:
- Use a crane to attach lifting points and slowly lower the toilet to the designated location.
- Align the position to ensure levelness, and place rubber shock-absorbing pads between the bottom and the foundation.
2. Fixation: - For concrete floors, secure the four corners with expansion bolts.
- For soil or sandy areas, install ground anchors and add diagonal braces for wind resistance.
- When installing multiple units side by side, connect them into a whole with bolts.
3. Water and Electricity Connection: - For flushing types: Connect to the tap water pipe, install angle valves, and seal with Teflon tape; check for no leaks.
- Sewage treatment: When connecting to municipal sewage pipes, create a water trap for odor prevention; if not, use built-in fecal tanks and reserve suction ports.
- Electrical: Connect to a 220V power supply, equip with a leakage protection switch, and wire up lights, exhaust fans, and sensors.
4. Interior Installation: - Install toilets, water tanks, and sinks.
- Seal gaps around corners, floors, and water pipes with sealant.
- Install door locks, handrails, hooks, paper towel holders, and other accessories.
5. Detail Inspection and Cleaning: - Check the flexibility of door locks and flush buttons, install door curtains and non-slip mats.
- Clean and disinfect the interior, and place air fresheners and toilet paper and other consumables.
III. Commissioning and Acceptance
1. Commissioning:
- Test flushing, drainage, and ventilation functions to ensure no blockages or odors.
- Check that door locks, lights, and sensors are functioning properly.
2. Cleaning and Acceptance: - Thoroughly clean the premises.
- Inspect for water leaks, electrical leaks, and odors.
- Provide the customer with an 'Equipment Installation Acceptance Form', noting the installation date, warranty period, and usage instructions.
IV. Precautions and Safety Regulations
1. Installation Safety Requirements:
- Wear safety harnesses for work at heights; installation is prohibited in windy conditions of ≥5 on the Beaufort scale.
- Keep away from fire sources; smoking or using open flame equipment inside the toilet is prohibited.
2. Construction Site Management: - Designate construction areas and set up warning signs.
- For nighttime construction, provide adequate lighting and install reflective strips for enhanced visibility.