Back to blog
Article
Mobile Toilet Squat Toilet Installation
Admin September 27, 2026
There are various installation methods for mobile toilet squat toilets, and the common installation steps are as follows:
I. Installation Methods for Stainless Steel Waterless Packaging Squat Toilets There are two main installation forms for stainless steel waterless packaging squat toilets:
- Floor-mounted Installation: Place the squat toilet directly at the preset position on the ground and connect it to the ground through the bottom fixing parts. This method is suitable for temporary or movable scenarios. During installation, ensure that the ground is level to avoid inconvenience in use or seal failure due to tilting.
- In-ground Installation: Embed the squat toilet into the ground, leaving only the using surface flush with the ground. This method requires excavating a foundation pit in advance and laying a waterproof layer or concrete foundation at the bottom to ensure stability. In-ground installation saves more space and is suitable for long-term fixed-use scenarios, such as construction sites and scenic spots without sewage pipelines.
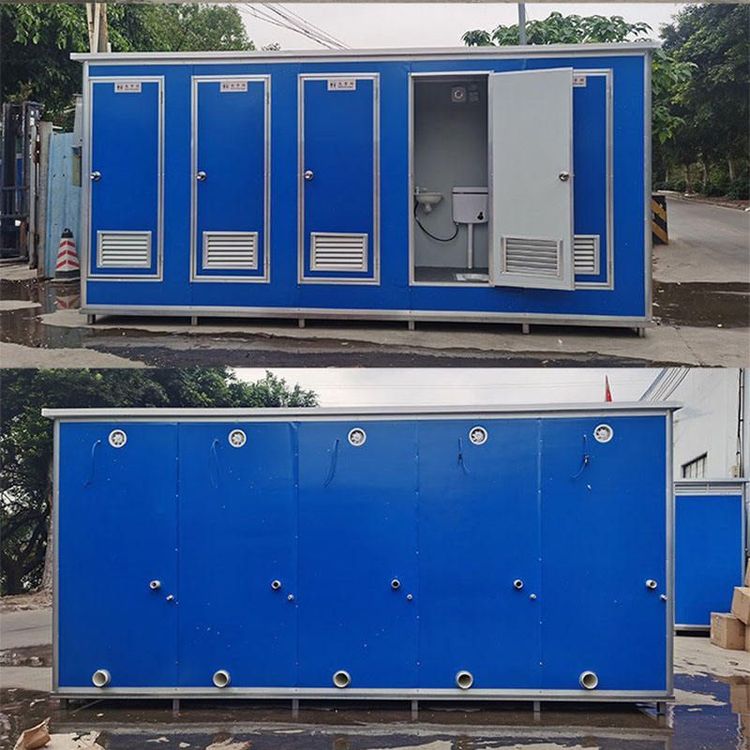
II. Installation Steps for Direct-discharge Mobile Toilets
- Pretreatment of Sewage Pipes: Apply structural adhesive evenly to the tee joint to ensure airtightness and prevent sewage leakage. The tee should be aligned with the sewage outlet of the squat toilet and connected to the main sewage pipe.
- Wall Fixation: Use corner posts, panels, rivet guns, and electric drills to assemble the wall frame according to the design drawings. The panels should be reinforced with rivets, and the connection points between the corner posts and the ground should be drilled and fixed to ensure the overall structural stability.
- Installation of Ventilation and Lighting: Install louvers at the reserved positions on the wall, fix them with screws, and check the opening and closing flexibility; at the same time, install an exhaust fan, connect the power cord, and test the ventilation effect.
- Sealing of Sewage Pipes: Apply waterproof adhesive to the top joint of the sewage pipe, connect the bottom steel pipe, and fix it to prevent odor from escaping.
- Installation of Door Panels and Accessories: Install the door panel and adjust the door lock to ensure smooth opening and closing; fix the washbasin, faucet, and flush tank, connect the upper water pipe between the tank and the washbasin, and test the water supply system.
- Connection of the Electrical System: Install light bulbs and one-switch five-hole sockets, connect the power cord of the exhaust fan, and check whether all circuits are powered on normally.
- Top Sealing: Fix the water inlet pipe and cover the top with waterproof materials or sealant to prevent rainwater from seeping in.
Precautions: Before installation, confirm the site conditions (such as ground flatness and sewage pipe location) and operate strictly in accordance with the product instructions; after installation, test the functions of each system to ensure there are no water leakage or electric leakage problems.