How to Deal with Water Leakage in Container Houses
The following steps can be taken to address water leakage in container houses:

1. Determine the Cause of the Leakage and the Responsible Party
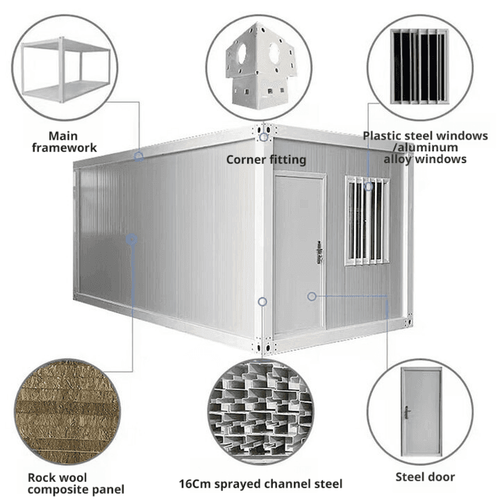
The cause of the leakage needs to be identified through observation and professional assessment. Common factors include quality issues with the container itself (such as metal rusting, weld cracks), improper installation (such as inadequate joint sealing, insufficient drainage slope), or human-induced damage during use (such as external impacts, unauthorized modifications). The responsible party is determined based on the cause: If the leakage is due to manufacturing defects in the container, the supplier is responsible; if it is due to installation issues, the installation team is responsible; if it is caused by improper maintenance or modifications by the user, the user is responsible.
2. Take Targeted Remedial Measures
Minor Repairs
- Waterproof Coatings: Suitable for metal aging or local cracks. Choose polyurethane or epoxy resin coatings and apply them evenly to the leakage area, focusing on covering gaps and aged areas. Regular maintenance is required.
- Sealant/Glass Glue: For tiny gaps at welds or screw holes, fill and compact directly. The operation is simple but requires regular inspection and reapplication.
- Welding Repairs: If the container is made of metal and the crack is small, use argon arc welding for repairs to avoid deformation of the container caused by electric welding.
Large-Scale Repairs
- Waterproof Membranes: After cleaning the base layer, lay modified asphalt membranes and fix them with adhesive. Conduct a water storage test (for more than 24 hours) after completion to confirm no leakage.
- Reinforcement with Covering Materials: Install steel structural keels and cover with materials such as color-coated steel plates, aluminum plates, or glass. Combine with glue application for both waterproofing and thermal insulation functions, suitable for overall roof modifications.
3. Collect Evidence and Communicate for Negotiation
- On-Site Records: Take photos and videos of the leakage location, extent, and internal damage (such as moldy furniture, peeling walls) to retain original evidence.
- Contracts and Receipts: Organize the container purchase contract, installation contract, payment vouchers, and quality warranty documents to clarify responsibility clauses and warranty periods.
- Contact the Responsible Party: Inform the responsible party of the leakage situation in writing (by email or letter) and request them to conduct an on-site inspection and formulate a repair plan, specifying the repair time limit (such as 7-15 working days).
4. Legal Means and Supporting Measures
If negotiation fails, entrust a lawyer to send a lawyer's letter, clearly stating the compensation claims (such as repair costs, compensation for property damage). If there is still no response, submit evidence (including contracts, photos, repair quotes, etc.) to the court and claim that the responsible party should bear the repair and compensation responsibilities. Daily Maintenance: Regularly inspect the drainage system and clean debris from the gutters; place activated carbon inside to absorb moisture and prevent mold growth caused by condensation.