Back to blog
Article
Homestay Portable Toilet Installation Guide
Admin October 10, 2026
The installation of portable toilets for homestays must follow standardized procedures to ensure safety and proper functionality. The specific steps are as follows:
I. Pre-installation Preparation
- Site Planning
- Select a dry, level area away from high-voltage power lines and low-lying areas prone to water accumulation. The ground bearing capacity must meet the weight requirements of the toilet. Reserve an access passage with a width of ≥1.2 meters and check that the sewage pipe is unobstructed (pre-position the sewage collection tank if used).
- Measure the site dimensions to ensure they match the toilet model, avoiding cramped spaces that may affect usability.
- Equipment and Material Inspection
- Verify that the toilet body and accessories (such as sinks, flushing devices, and sewage pipes) are complete. Check for no external damage and that internal facilities are intact.
- Prepare tools: wrenches, screwdrivers, spirit levels, electric drills (if lighting is to be installed), and insulating gloves. If a lighting system is configured, select LED fixtures with an IP65 or higher protection rating and confirm that the toilet has a reserved power outlet.
- Personnel and Safety
- Assign 2-3 professional personnel for the operation. Wear safety harnesses during high-altitude work and prohibit installation in windy conditions of ≥ force 5 on the Beaufort scale.
- Set up warning signs in the construction area and equip night-time construction with lighting devices to ensure safety.
II. On-site Installation Steps
- Foundation Fixing
- Hoist the toilet body to the designated position and adjust it to level using a spirit level (deviation ≤3mm). Secure it with expansion bolts or counterweights to prevent tipping.
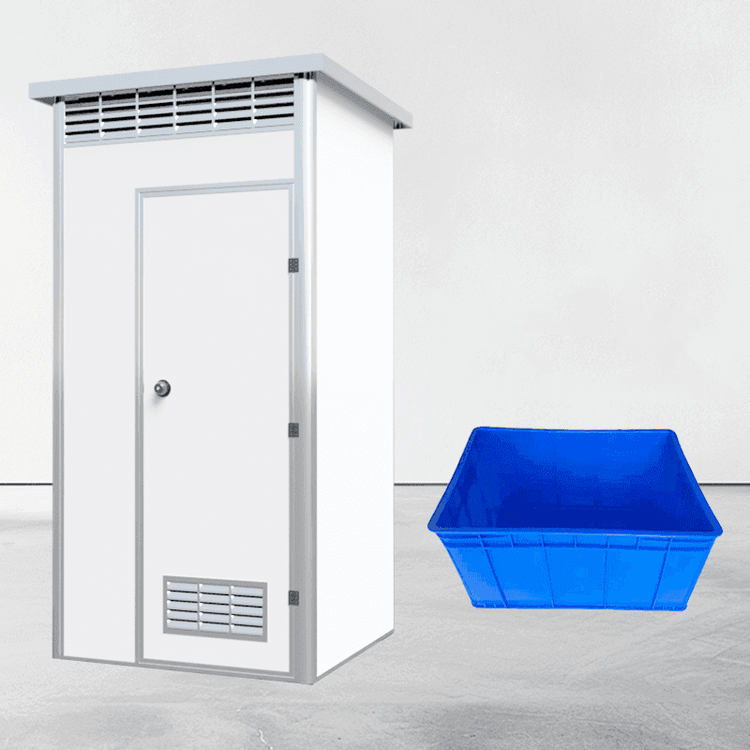
- Assemble the frame: Fix the base and wall panels (right → left → front) in sequence, tighten the screws, and check for airtightness; install the top slot, ventilation louvers, and roof cover to ensure structural stability.
- Water and Electricity Connection and Debugging
- Sewage System: Connect the sewage pipe to the sewer or sewage collection tank, ensuring a pipe slope of ≥2% to prevent blockage.
- Water Supply System: Connect a water pipe of ≥DN20, test the flushing function and drainage airtightness to ensure no leakage.
- Lighting System (if required): Drill holes to fix the light fixture bracket, connect the power cord (note the color coding standards for live, neutral, and ground wires), install a waterproof switch, and test the lighting effect.
- Detail Handling and Finalization
- Install accessories such as door curtains, non-slip mats, and door locks, and check the flexibility of the flush button and locks.
- Clean the interior, place consumables such as air fresheners and toilet paper, and tighten all bolts and nuts to prevent loosening.
III. Post-installation Acceptance
- Function Testing
- Press the flush button three times consecutively to confirm smooth drainage; evenly step on the top of the equipment to check load-bearing stability.
- Test the lighting system to ensure no flickering or short circuits.
- Delivery Documents
- Provide an Equipment Installation Acceptance Certificate, indicating the installation date, warranty period, and usage instructions for the convenience of subsequent maintenance by users.
IV. Precautions
- Safety Regulations: Do not smoke or use open flames inside the toilet and keep away from fire sources.
- Daily Maintenance: Regularly clean dust from the light fixtures and inspect the sewage pipe to prevent blockage or corrosion.
- Relocation and Power Disconnection: If relocating the toilet, disconnect the power supply in advance and check the integrity of the wiring to prevent damage.
By following standardized installation and acceptance procedures, the long-term stable operation of portable toilets for homestays can be ensured, enhancing the user experience.
Related