
Ehang-Cross Quick Assembly Box Installation Guide
Ehang-Cross Quick Assembly Modular Housing Construction Plan
This guide covers the standard installation steps for the Ehang-Cross quick-assembly box for on-site construction.
Installation Steps
1. Chassis Frame Assembly and Leveling
- Take 4 base corner pieces, 2 long base beams, and 2 short base beams. Assemble the base frame with bolted connections, as shown in Figure 1-1.
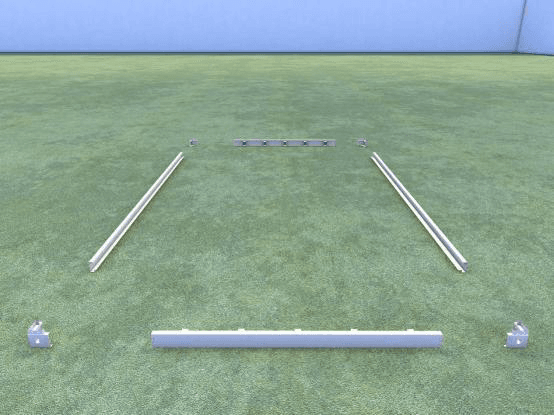
- While carrying out step 1, adjust the level and the diagonal lines, and raise the chassis as needed so everything sits at the same level. When the level and the base-frame diagonals are accurate, tighten the bolts with a socket wrench.
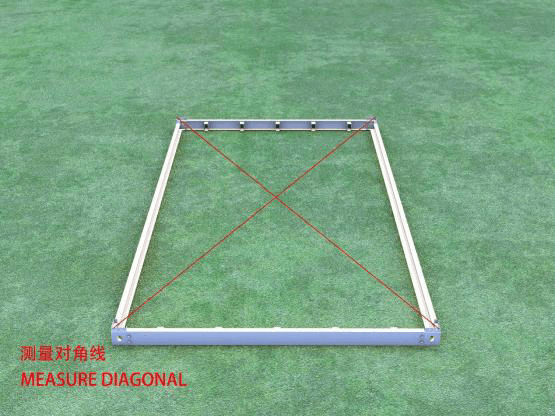
- After completing the above steps, you obtain the chassis frame as shown.
2. Chassis Purlin Installation
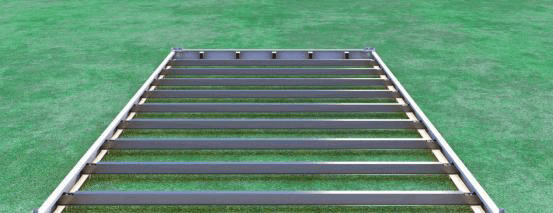
- Install 9 C-shaped (trapezoidal) purlins. Align them with the corresponding holes on the long base beams, fix with bolts, and tighten, as shown in Figure 2-1.
3. Install Columns and Top Frame
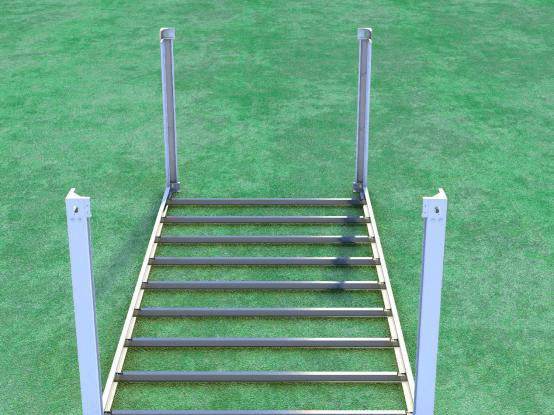
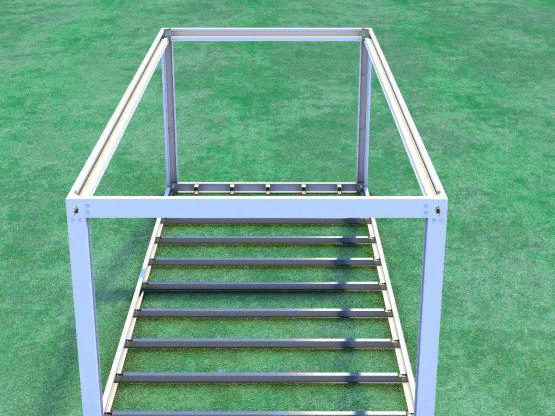
Place 4 top-frame corner pieces onto 4 identical columns and connect them with No.12 carriage bolts. Insert the other end of each column into the base corner pieces and secure them with No.12 carriage bolts as well.
Use a stepladder to assemble the four top beams onto the top-frame corner pieces and connect them with No.12 carriage bolts, as shown in Figures 3-1 and 3-2.
4. Framework Adjustment
- Use a level or leveling instrument to adjust both sides of each column in turn, then tighten the corresponding bolts with a wrench so the top frame and base frame remain level and plumb.
5. Wall Cladding with Color-Steel Rock-Wool Panels; Doors and Windows
- Install the rear wall first. The rear wall consists of two 2.56 m full panels plus a window with upper and lower window panels (Figure 5-1).
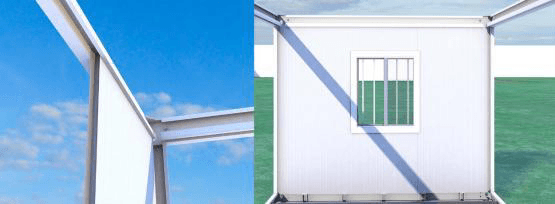
When installing wall panels, first insert each panel into the 5 cm groove of the top beam.
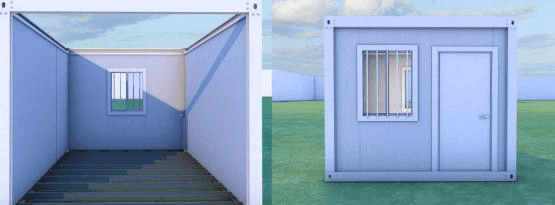
Then install the side walls and front wall. All side walls are assembled from 2.55 m rock-wool panels. For the front wall, cut one full panel into one 15 cm piece and two 40 cm pieces: place the 15 cm piece at the door corner as the door edge, and place the two 40 cm pieces on both sides of the window (Figure 5-2).
6. Floor Installation
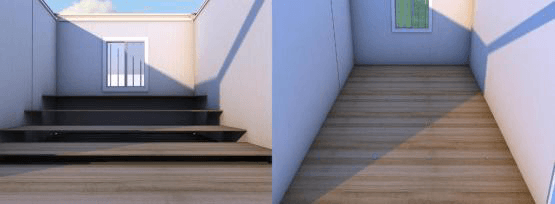
Lay five floorboards on the purlins from the inside outward. Keep both sides of the boards in a straight line so they fit tightly against the side wall panels (Figure 6-1).
Keep the floor level and secure each board to the C-shaped purlins with floor nails.
7. Box Top Structure Installation
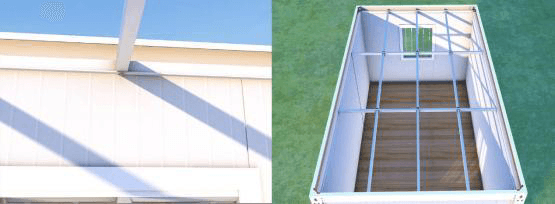
- Install the roof ridge/purlin strips. At contact points with the top beams, drive self-drilling screws from bottom to top to connect the top beams and strips. Place square tubes in the brackets and fasten them the same way from bottom to top (Figure 7-1).
8. Interior Ceiling Installation
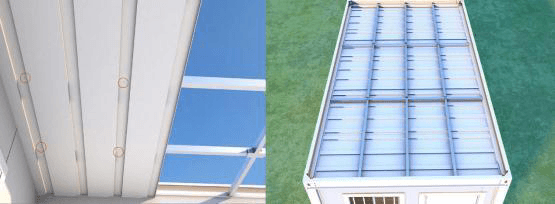
- Lay and fix the ceiling boards/tiles flat onto the top purlins, as shown in Figure 8-1.
9. Top Tile Installation
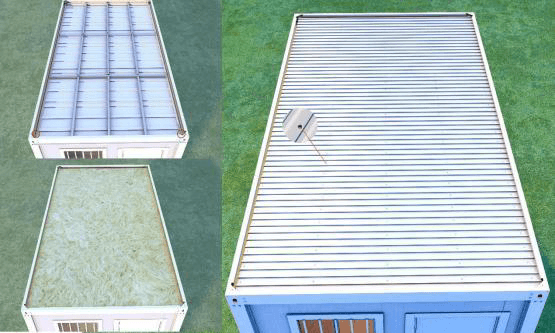
Before laying roof tiles, apply sealing strips along the outer edges of the two six-meter top beams near the drainage channel to prevent water backflow.
Lay insulating rock-wool rolls on the roof surface.
Install type-980 roof tiles and fasten them to the purlins with self-tapping screws. When placing tiles, let them overhang the top-beam drainage channel by 2 cm. Then fasten at every other flat purlin bay. Apply waterproof sealant at tile overlaps and on the heads of the top-surface self-tapping screws (Figure 9-1).
Notes
Apply waterproof sealant along the joint between the outer bottom beam and the wall panels to prevent water from seeping through the wall panels into the floor.



