Back to blog
Article
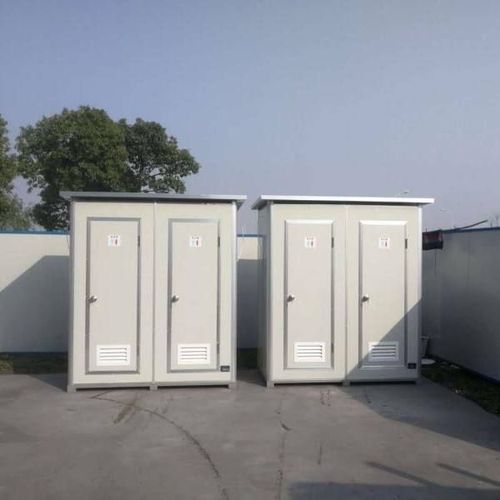
Direct Discharge Mobile Toilet Installation
Admin September 27, 2026
The installation of a direct discharge mobile toilet should follow the steps below to ensure safety, standardization, and complete functionality:

I. Planning and Preparation Before Installation
Site Assessment and Selection
- Ground Requirements: Choose a solid and flat ground (such as cement-hardened ground or asphalt ground), avoiding low-lying areas prone to water accumulation to prevent rainwater backflow or foundation settlement.
- Sewage Discharge Conditions: Confirm that there is an accessible municipal sewage network or a preset septic tank interface near the installation point, ensuring a reasonable slope (usually ≥2%) for the sewage discharge pipes to prevent blockages.
- Space and Ventilation: Reserve sufficient space for use and passage (it is recommended to have at least 1.5 meters around a single toilet), and set up barrier-free access; consider the wind direction and place the toilet downwind to reduce odor diffusion.
Infrastructure Preparation
- Sewage Discharge Interface: Lead the underground sewage discharge pipe interface to the ground in advance, install an odor-proof floor drain or a对接法兰 (docking flange, here it means a connecting flange), and ensure tightness (waterproof glue can be applied or rubber sealing rings can be used).
- Water and Electricity Reservation: If lighting, exhaust fans, or automatic flushing devices are required, reserve waterproof power outlets (the voltage should match the equipment requirements); if hand washing or enhanced toilet flushing is needed, reserve water supply pipe interfaces and install valves.
- Fixing Devices: Prepare ground fixing rings, expansion bolts, or windproof cables according to the environment to prevent the toilet from moving or tipping over due to external forces.
Equipment Inspection
- Main Structure: Check whether the toilet shell, doors, and windows are intact, whether the switches are smooth, and whether the internal accessories (such as the toilet bowl, water tank, and handrails) are complete and firmly fixed.
- Sewage Discharge Valve: Focus on checking the flexibility of the switch and the integrity of the sealing rubber ring of the bottom sewage discharge valve to avoid liquid leakage or odor leakage.
II. Main Body Positioning and Leveling
Transportation and Hoisting
- Use a forklift or crane for handling. The lifting straps or forklift tines must act on the dedicated load-bearing structures (such as steel beams or reinforced frames) at the bottom of the toilet. It is strictly prohibited to hook onto the roof, walls, or railings to prevent structural damage.
- The commander and the operator should cooperate closely and move slowly to avoid violent shaking or collision with surrounding facilities.
Precise Positioning
- Slowly lower the toilet until the sewage discharge outlet is aligned above the pre-set ground interface, and ensure alignment through fine adjustments (such as manual shifting or hydraulic devices), with the deviation controlled within ±2 centimeters.
Level Adjustment
- Use a level to detect the levelness of the four corners of the toilet, and adjust the bottom support feet or shims (such as rubber pads or metal adjustment blocks) to keep it level, preventing sewage discharge blockages or equipment damage due to tilting.
Precautions: After installation, conduct functional tests, including the flushing, sewage discharge, and ventilation systems, to ensure no leakage, blockage, or abnormal noise; regularly check the fixing devices and seals to extend the service life.