Back to blog
Article
Installation Process of Portable Toilets at Construction Sites
Admin September 29, 2026
The installation process of portable toilets at construction sites is divided into three stages: pre-installation preparation, on-site installation execution, and post-installation inspection and delivery. The specific steps are as follows:

I. Pre-Installation Preparation
- Site Survey and Planning
- Confirm the installation location in advance, avoiding low-lying areas prone to water accumulation, high-voltage lines, and obstacles to ensure a dry and safe site.
- Measure the site dimensions to ensure the toilet access passage width is ≥1.2 meters and reserve operational space (e.g., for equipment handling and personnel maintenance).
- Material Inventory and Inspection
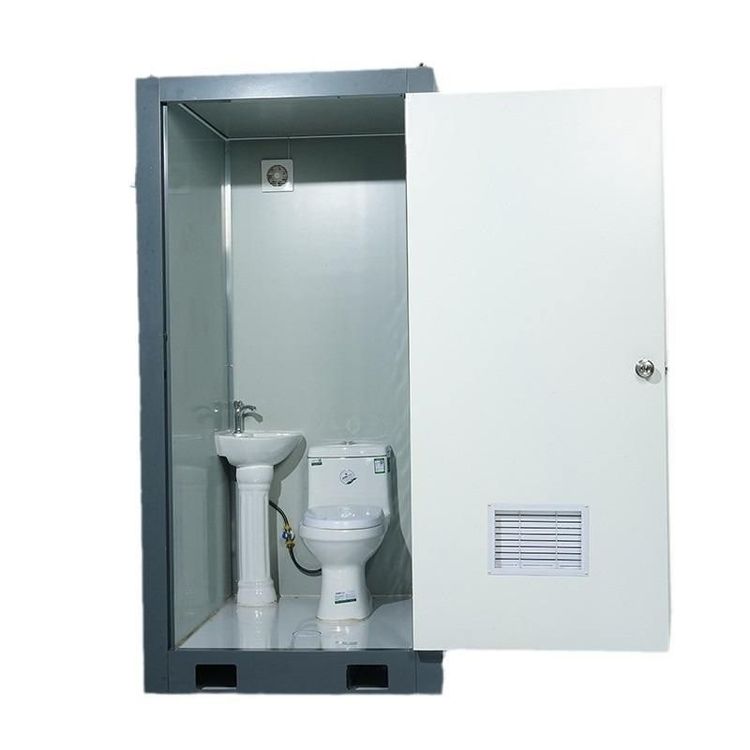
- Upon arrival, verify the quantity, model, and accessories (such as sinks, flushing devices, sewage pipes, and curtains) of the portable toilets to ensure all components are present.
- Inspect the equipment for any external damage and ensure internal facilities (such as water tanks, toilet bowls, and electrical circuits) are functioning properly to avoid installation delays due to material issues.
- Tool and Personnel Preparation
- Equip with tools such as wrenches, screwdrivers, spirit levels, and sealants to ensure all installation tools are complete and suitable.
- Arrange for 2-3 professional installers. If the toilet is large or the installation environment is complex, coordinate with equipment such as cranes for assistance in handling.
II. On-Site Installation Execution Steps
- Foundation Fixing Operations
- Use a crane to lift the toilet body to the designated location and adjust its levelness using a spirit level, with a deviation of ≤3mm to prevent inconvenience or structural damage due to tilting.
- Secure the equipment using expansion bolts (for hard surfaces) or counterweights (for soft surfaces) to ensure stability in areas with strong winds (such as high-rise construction sites).
- Water and Electricity Connection and Debugging
- Connect the sewage pipe to the nearest sewer or designated sewage collection tank, ensuring a pipe slope of ≥2% to prevent sewage backflow or blockage.
- Connect to a water source (recommended to use a pipe with a diameter of ≥DN20), test the flushing function, and check the drainage seal to ensure no leakage.
- If it is an electrically operated flushing toilet, connect to the power supply and test the circuit safety.
- Detail Inspection and Cleaning
- Install accessories such as curtains, non-slip mats, and handrails, and check the flexibility and usability of facilities such as door locks, flush buttons, and lighting.
- Clean and disinfect the interior of the toilet, place consumables such as air fresheners and toilet paper to enhance the user experience.
III. Post-Installation Inspection and Delivery
- Function Testing Checklist
- Flush Testing: Press the flush button three times consecutively to observe whether the drainage is smooth and free of blockages or odors.
- Load-Bearing Testing: Evenly step on the top of the equipment (such as the roof or access hatch) to check structural stability and ensure no abnormal noises or deformations.
- Delivery Document Confirmation
- Provide the customer with an 'Equipment Installation Acceptance Certificate', indicating the installation date, warranty period (usually 1 year), and usage instructions (such as daily maintenance and fault reporting methods).
- Demonstrate the operational procedures on-site to ensure the customer masters the basic usage methods.